Cactus from Cuttings: Simple Propagation Guide
Growing cacti from cuttings is a simple way to expand your plant collection without spending money. Taking a piece of a mature cactus and turning it into a new plant brings satisfaction and helps you learn about plant growth. Before planting a cactus cutting, you must allow the cut end to form a callus, which can take about 2 weeks depending on the type of cactus.
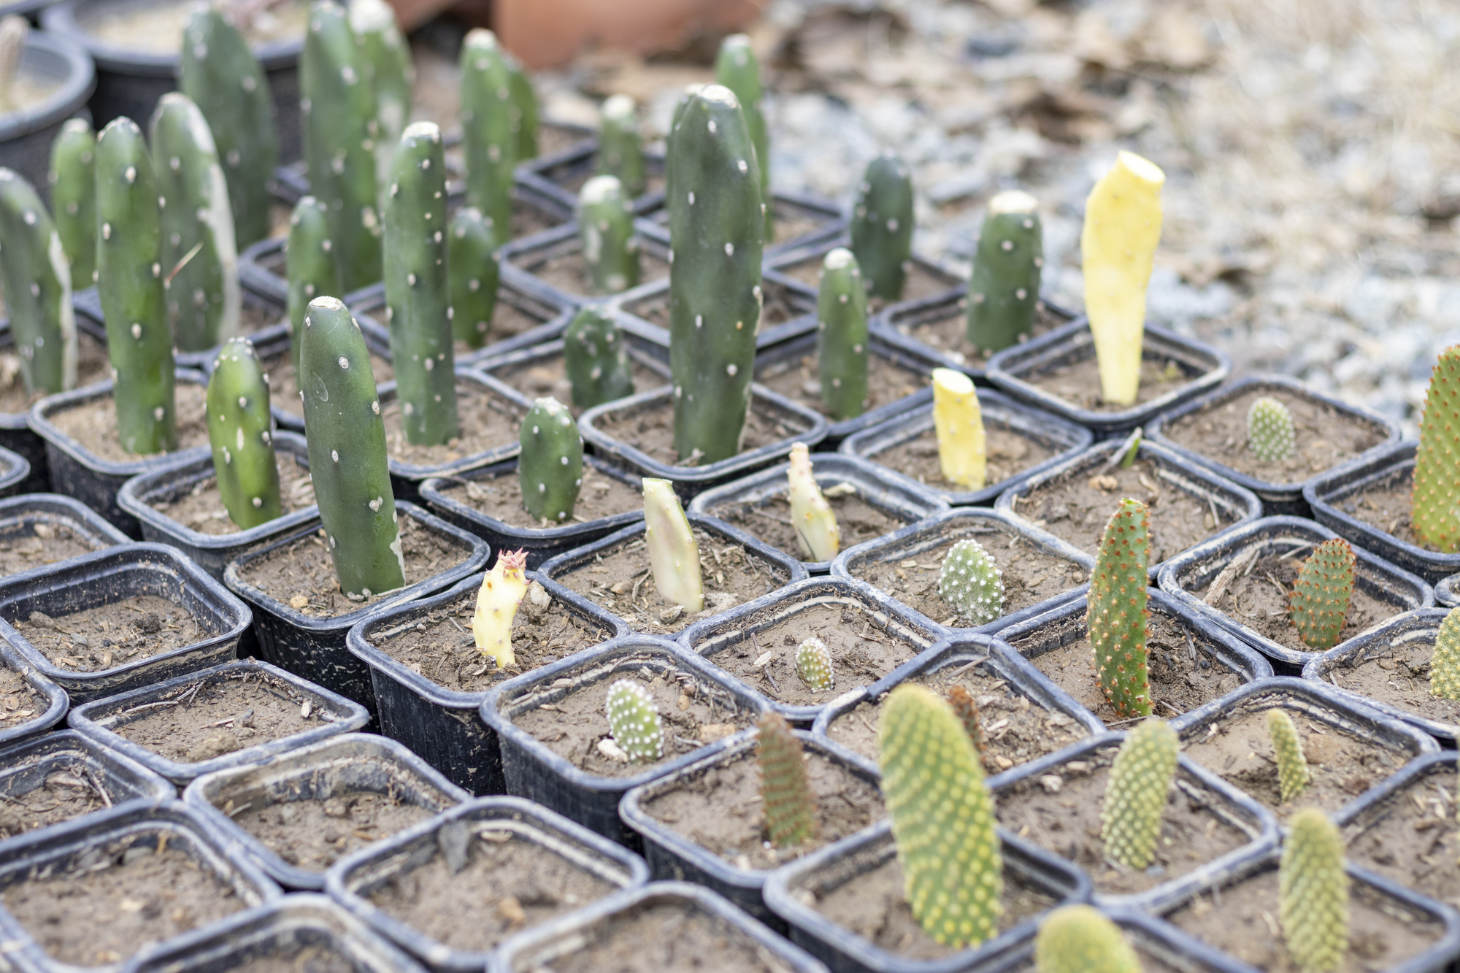
This callus formation is crucial for successful propagation. It creates a protective barrier that prevents rot when the cutting is placed in soil. Once your cutting has callused, you’ll need to plant it at a depth appropriate to its size, typically 1-2 inches for small cuttings and deeper for larger ones, using stakes for support until roots develop. Most cacti, especially segmented varieties like prickly pears and Christmas cacti, propagate easily this way.
You don’t need fancy equipment to grow cacti from cuttings, just patience and the right technique. Place your cutting in a warm location with indirect light during the callusing process. After planting, provide proper drainage and minimal water until you see signs of new growth, which indicates root development.
Key Takeaways
- Cactus cuttings must form a callus before planting to prevent rot and disease.
- Support newly planted cuttings with stakes and place in indirect light for best results.
- Water sparingly and provide good drainage to encourage healthy root development in new cactus cuttings.
Understanding Cactus Propagation
Growing new cacti from existing plants is both rewarding and economical. There are several effective methods that allow you to expand your collection while preserving the characteristics of your favorite plants.
Propagation Methods
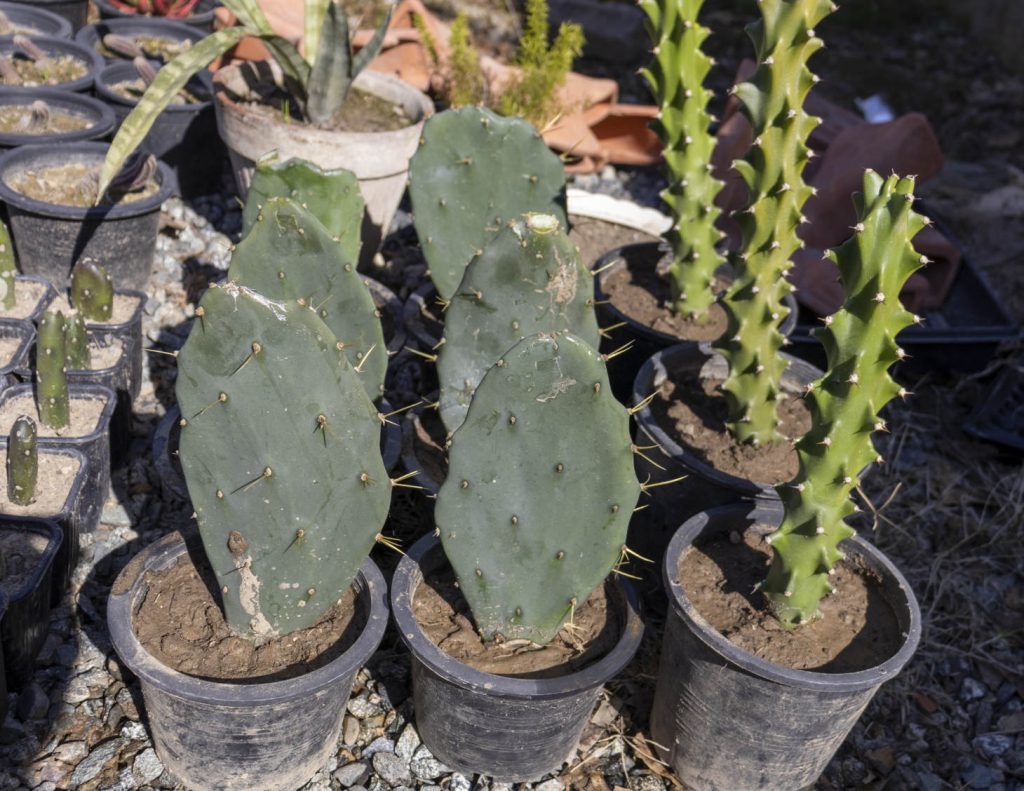
Stem cuttings are the most common way to propagate cacti. To start, use a clean, sharp knife to cut a section from a healthy cactus. For segmented varieties like prickly pear or Christmas cacti, simply remove one or more segments.
After taking your cutting, the most critical step is allowing it to callus. This means letting the cut end dry and form a protective scab, which typically at least 2 weeks and can take up to 4 weeks or more depending on the type of cactus and environmental conditions. This prevents rot when planted.
When the callus has formed, plant your cutting in well-draining cactus soil. Insert it about 1-2 inches deep, and you may need to prop it against something for support until roots develop.
Water sparingly until roots form. Many cactus growers recommend keeping the soil mostly dry during this period to prevent rot.
Benefits of Propagation
Propagating cacti through cuttings saves money while expanding your collection. One mature cactus can produce multiple new plants at no cost.
Cactus propagation preserves the exact traits of plants you already love. Unlike growing from seeds, cuttings are genetic clones of the parent plant, maintaining all desirable characteristics.
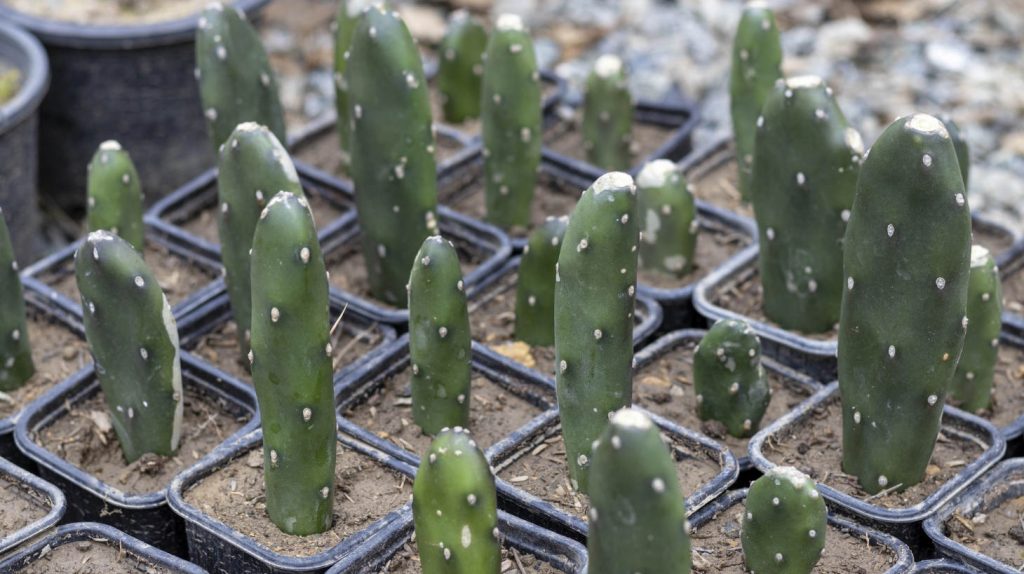
The process is beginner-friendly, especially with varieties like Mexican fence post cactus and prickly pear. These hardy cacti have high success rates even for novice gardeners.
Creating new plants from cuttings also allows you to share with friends or replace aging specimens. Many cactus enthusiasts build community by exchanging unique varieties they’ve propagated.
Preparing to Propagate from Cuttings
Successful cactus propagation begins with proper preparation. Taking the time to select quality cuttings, use correct cutting techniques, and allow proper healing will significantly increase your chances of growing healthy new plants.
Selecting Quality Cuttings
Choose cuttings from healthy, mature cacti that show no signs of disease, pests, or damage. The best cuttings come from healthy sections that are appropriate for the specific plant type and season, which may include both young and older growth depending on the species.
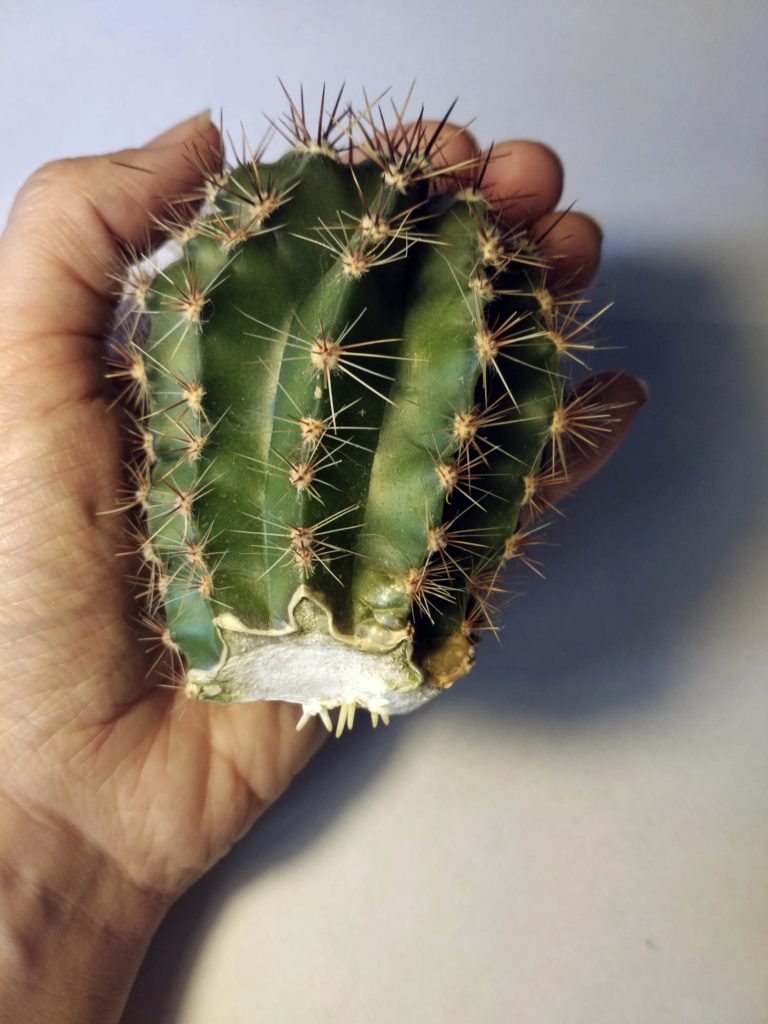
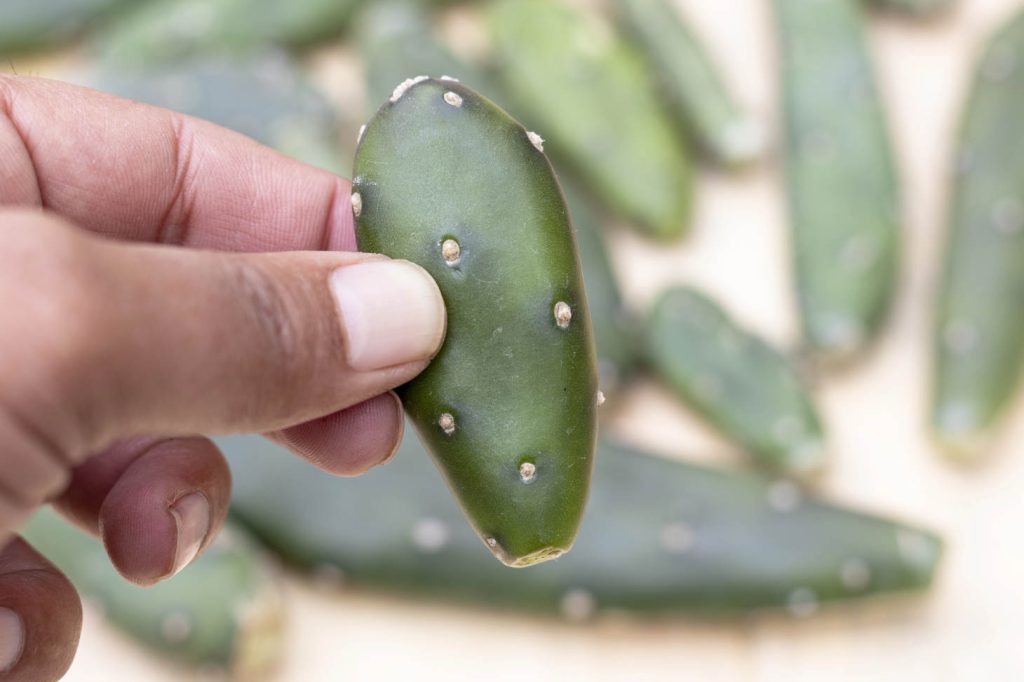
Look for plump, firm segments with vibrant color. Avoid any parts that appear shriveled, discolored, or soft. For columnar cacti like San Pedro, select a cutting that’s at least 4-6 inches long. For pad-type cacti like Opuntia (prickly pear), choose a full, mature pad.
The best time to take cuttings is during the growing season (spring to summer) when the plant is actively growing. This gives your cutting the best chance to develop roots quickly after the healing process.
Proper Cutting Techniques
Use a clean, sharp knife or pruning shears to make your cuts. Sterilize your tools with rubbing alcohol before cutting to prevent introducing pathogens to the plant.
For columnar cacti, make top cuts at one end and horizontal mid cuts separately through the middle. For pad-type cacti, cut at the natural joint between pads. Always wear thick gloves to protect yourself from spines and irritating sap, but consider using additional tools like tongs for better control.
Make your cuts at a slight angle rather than perfectly straight. This creates more surface area for roots to develop and helps prevent water from pooling on the cut surface, which could lead to rot.
Cutting Treatment and Healing
After taking your cutting, place it in a dry, shaded area for 2-4 weeks. This crucial healing period allows the cut surface to form a protective callus, preventing rot when planted.
Many experienced horticulturists recommend dusting the cut end with sulfur powder or rooting hormone to prevent fungal growth during the callusing process. The callus should feel dry and corky when properly healed.
Keep your cuttings away from direct sunlight during healing. The ideal environment is warm (65-75°F) with good air circulation. Once the cutting has callused, it’s ready for planting in well-draining soil. Stand it upright or prop it against something for support until roots develop.
Planting and Caring for New Cactus Cuttings
Successful cactus propagation requires the right foundation and care after planting. The following guidelines will help your cuttings develop strong roots and grow into healthy plants.
Choosing the Right Soil
Cactus cuttings need well-draining soil to prevent root rot. Use a specialized cactus potting mix or create your own by combining regular potting soil with coarse sand and perlite in equal parts. This mixture allows water to flow through quickly while providing enough structure for roots to develop.
For desert gardening enthusiasts, you can add a small amount of local soil to help your cactus adapt to the regional conditions, but ensure the final mix is well-draining. Avoid using garden soil alone as it’s usually too dense and retains too much moisture.
The ideal pH for most cacti is slightly acidic to neutral (6.0-7.0). Commercial cactus mixes may vary in pH balance, and it is important for users to test the pH of the mix to ensure it meets the specific needs of their cacti.
Potting and Initial Care
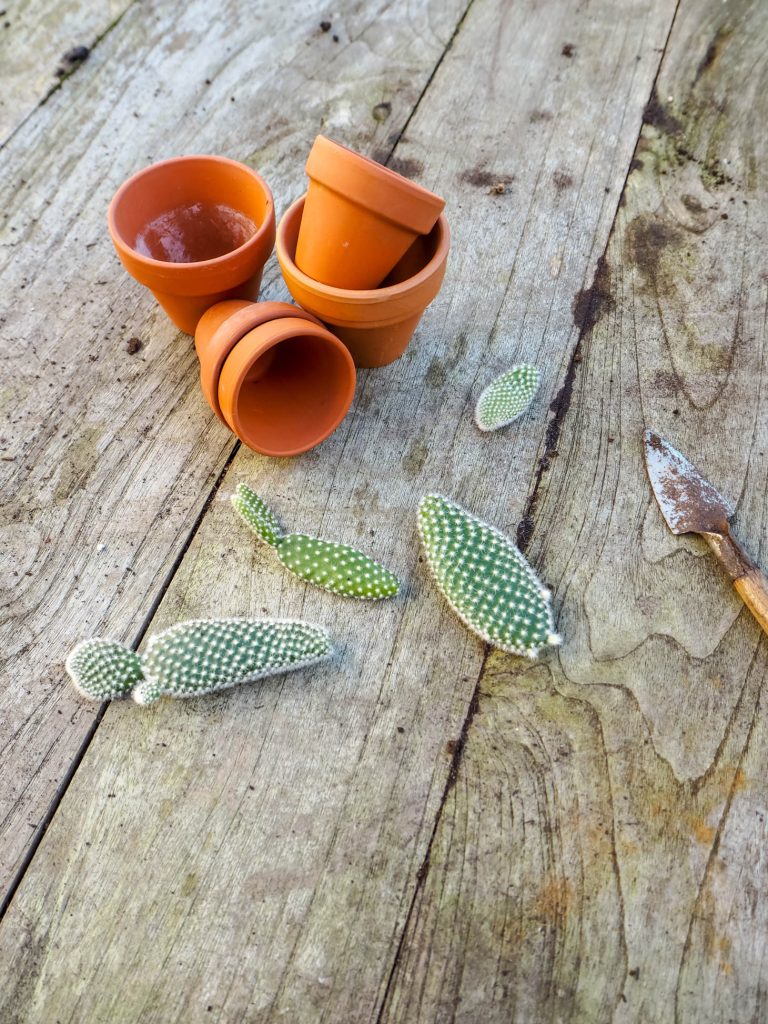
Select a pot slightly wider than your cutting with drainage holes. Terracotta pots work well as they allow soil to dry evenly. Fill the pot with your prepared soil mix, leaving enough space for the cutting.
Before planting, let your cutting callus for at least 2 weeks until the cut end forms a dry seal. This crucial step prevents rot when planted.
Place the cutting about 1-2 inches deep in the soil. For taller cuttings, you may need to prop them against something for support until they develop roots. Don’t water immediately after planting. Wait at least a week to allow the cutting to settle.
Keep newly potted cuttings in a bright location but away from direct, harsh sunlight during this establishment phase.
Watering and Sunlight Requirements

Water sparingly until roots form, which can take 4-8 weeks or longer depending on the species. To check for root development, gently tug the cutting, resistance indicates root growth. Once rooted, water only when the soil is completely dry, typically every 2-3 weeks depending on your climate.
During hot summer months, especially in desert regions, you might need to water more frequently but always allow the soil to dry completely between waterings. Reduce watering in winter when the plant is dormant.
For optimal growth, place your rooted cactus where it receives 6-8 hours of sunlight daily, with specific needs varying by species. Too much intense afternoon sun can scorch new plants. Gradually increase sun exposure as the cactus becomes established.
Monitor your new plant for signs of stress like yellowing or shriveling, which might indicate watering or light issues that need adjustment.
Frequently Asked Questions
Growing cacti from cuttings is a simple process once you understand the basics. Below are answers to common questions about propagating cacti successfully from cuttings.
What is the correct method to propagate a cactus from cuttings?
To propagate a cactus from cuttings, start by selecting a healthy stem and making a clean cut with sterilized tools. The cutting should be at least 6-8 inches long for columnar varieties like San Pedro, while other types may vary.
Allow the cut end to form a callus by placing it in a dry, shaded area for 2-4 weeks. This crucial step prevents rot when you plant the cutting.
After callusing, you can either dip the cut end in rooting hormone (optional but helpful) or plant directly in a well-draining soil mix.
How do you encourage root growth in cactus cuttings?
Root growth in cactus cuttings is encouraged by proper callusing before planting. Ensure the cutting has fully healed at the cut end before planting.
Using rooting hormone can significantly improve success rates. Simply dip the callused end in the hormone powder right before planting.
Maintain warm temperatures between 65-75°F (18-24°C) for optimal root development. Avoid overwatering, as this can cause rot before roots form.
What are the best conditions for rooting cactus cuttings in water?
Water propagation is less common for cacti but can work for some species. Use a clean container with just enough water to touch the bottom of the cutting.
Change the water every week or two to prevent bacterial growth. Only the very bottom of the cutting should contact the water to avoid rot.
Place the container in bright, indirect light. Watch for roots to develop over 2-4 weeks, then transfer to a well-draining potting mix once roots are about 1 inch long.
What are the guidelines for planting cactus cuttings in soil?
Use a well-draining cactus soil mix. You can make your own by combining 3 parts potting soil, 3 parts coarse sand, and 2 parts perlite or pumice.
Plant the callused cutting about 1-2 inches deep in a well-draining soil. Wait 4-8 weeks before watering the cutting until you observe the first signs of root development.
Position your newly planted cutting in bright, indirect light. Direct sun can stress new cuttings before they establish roots.
How long does it take for a cactus cutting to root?
Most cactus cuttings can take anywhere from 4 to 8 weeks to develop roots, depending on species and environmental conditions. You may not see visible growth above the soil during this time.
Temperature also affects rooting time. Warmer conditions generally speed up the process.
You can gently test for rooting by giving the cutting a very slight tug. If you feel resistance, roots have begun to form.
What are the signs of successful cactus cutting propagation?
The most reliable sign of successful propagation is new growth at the top of the cutting. This indicates that the plant has established roots.
Firmness of the cutting is another good indicator. A well-rooted cutting will remain firm and may even plump up slightly compared to when first planted.
Stable natural color can also signal success. A healthy, rooting cutting maintains its natural color without yellowing, wrinkling, or becoming soft at the base.