How To Save A Dying Cactus
A cactus can survive tough conditions, but even these hardy plants can start to wilt, rot, or shrivel when something goes wrong. You might notice soft spots, yellowing, or a dry, drooping stem that signals distress. You can save a dying cactus by adjusting water, light, and soil conditions before the damage becomes permanent.
When you understand what’s causing the decline, you can act quickly to bring your plant back to health. Learning to spot early warning signs helps you fix the problem before it spreads. With the right steps, your cactus can recover and grow strong again.
This guide walks you through how to recognize trouble, take immediate action, and create the best environment for lasting recovery. By the end, you’ll know how to keep your cactus healthy and prevent future problems.
Recognizing Signs of a Dying Cactus
A cactus that starts to wilt, soften, or lose color is showing distress. You can often pinpoint the cause by observing its surface, texture, and roots. Early detection helps you act before the damage becomes irreversible.
Common Symptoms and Visual Cues
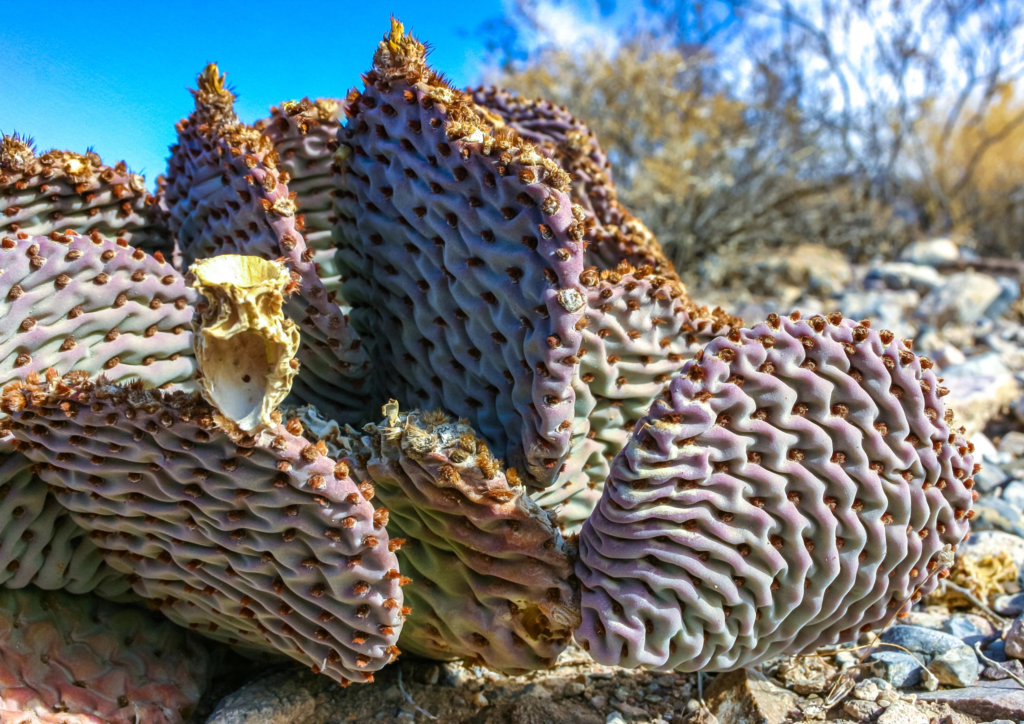
A healthy cactus stands firm, with plump stems and consistent color. When it begins to fail, you may see wrinkling, drooping, or shriveling. These changes suggest dehydration or root damage.
Softness in the stem often means too much water or poor drainage. A leaning cactus may indicate weak roots or uneven light exposure.
Check for white cotton-like residue, which could be mealybugs or fungus. Also, a foul odor or collapsed sections signal that decay has started.
Use this quick reference:
| Symptom | Possible Cause |
|---|---|
| Wrinkled pads | Lack of water |
| Mushy texture | Overwatering |
| Leaning | Weak roots or poor light |
| White residue | Pest infestation |
Root Rot Indicators
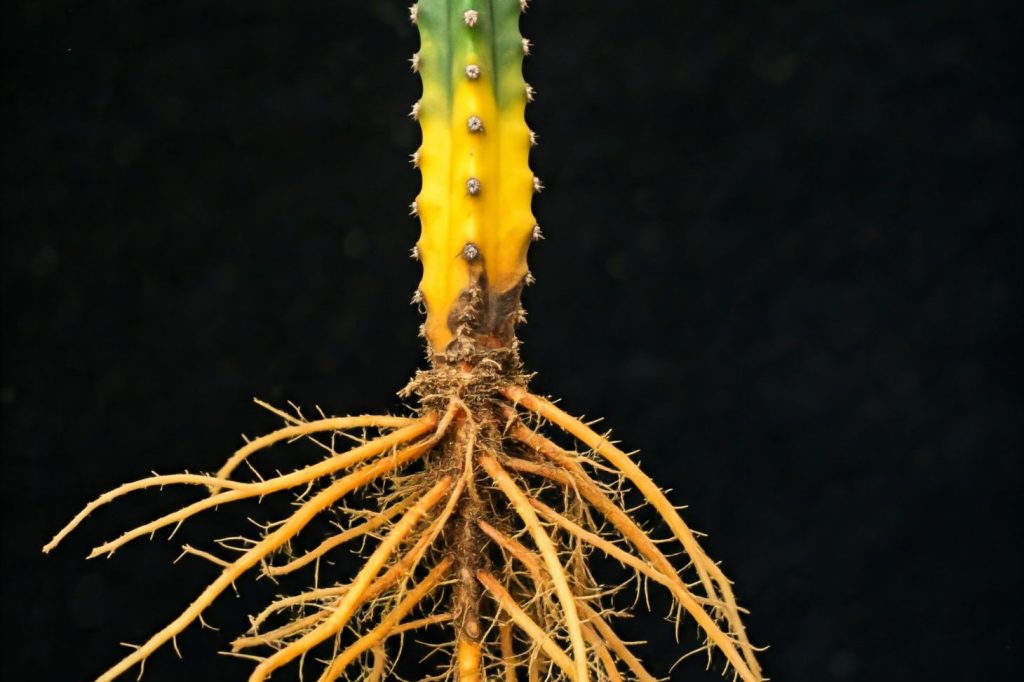
Root rot is one of the most common reasons a cactus dies. It develops when the soil stays wet for too long, cutting off oxygen to the roots.
To check, remove the cactus from its pot and inspect the roots. Healthy roots are firm and light-colored. Rotting roots appear black or brown, feel slimy, and may smell sour.
If only part of the root system is affected, you can trim away the damaged sections with sterilized scissors. Allow the plant to thoroughly dry and callus for several days to a week or more before replanting in fresh, well-draining soil.
Prevent root rot by using a pot with drainage holes and watering only when the soil is completely dry.
Discoloration and Soft Spots

Color changes often reveal stress or disease. A cactus turning yellow or brown may be receiving too much sunlight, overwatering, underwatering, or suffering from fungal infection.
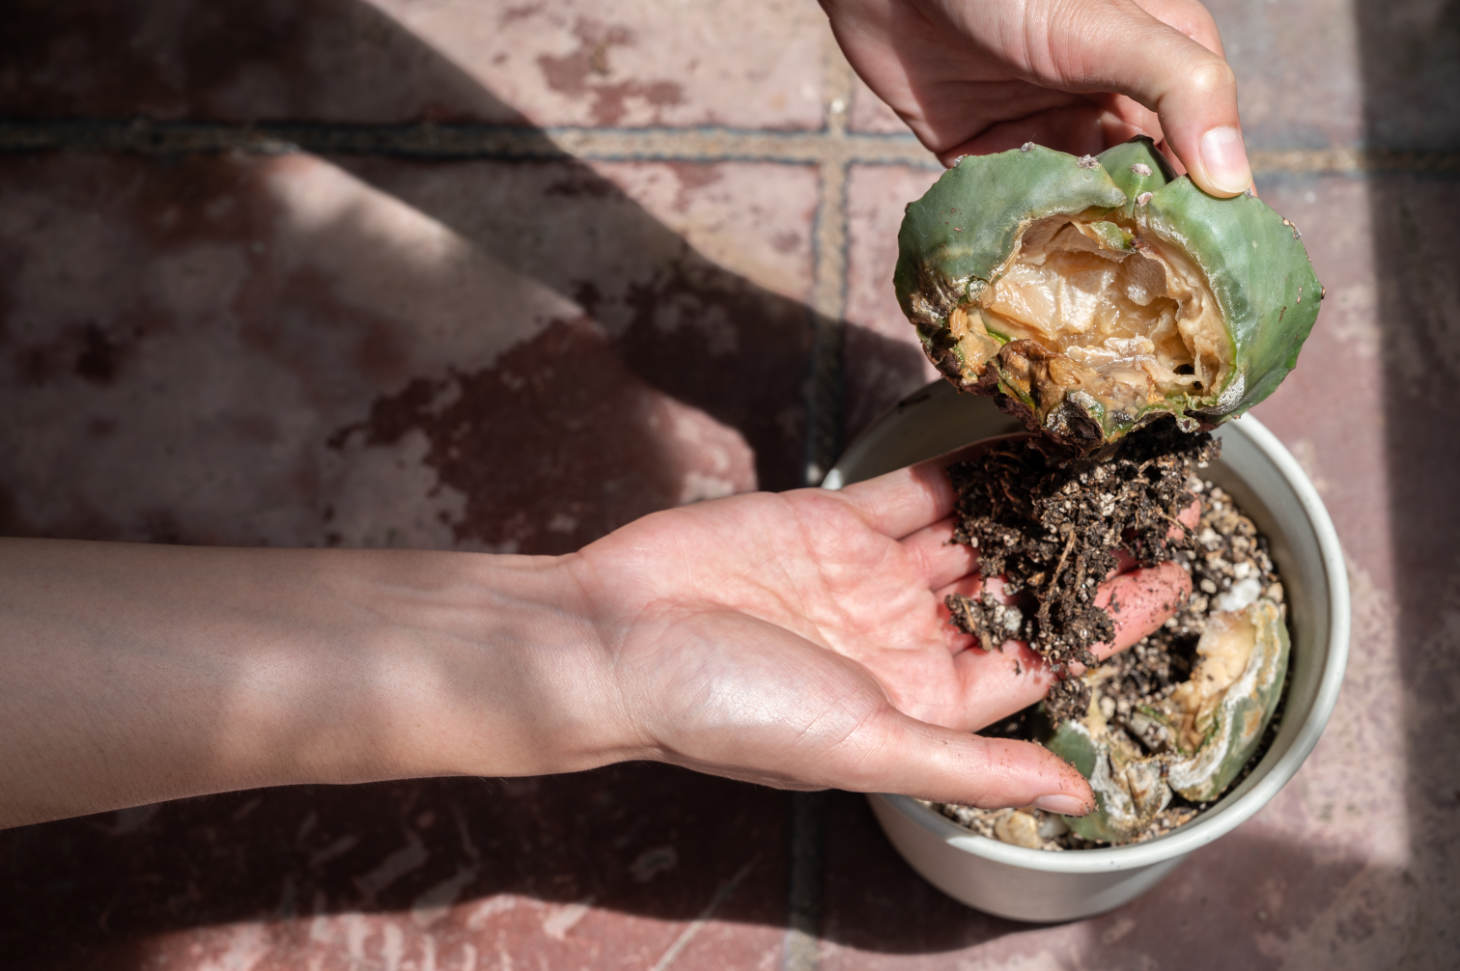
Soft or mushy spots usually form where rot has started. These areas can spread quickly if not removed. Cut away the affected parts with a clean knife to stop the decay.
If the cactus looks pale or grayish, it might not be getting enough light. Adjust the plant’s position so it receives bright, indirect sunlight to encourage recovery and healthy growth.
Immediate Steps to Save a Dying Cactus
You can often save a dying cactus by removing damaged parts, repotting it in clean, well-draining soil, and giving it time to dry and recover. These steps stop rot from spreading, restore healthy roots, and help the plant regain strength.
Cutting Away Rotting Parts
Check the cactus for soft, discolored, or blackened areas. These spots often mean rot caused by too much moisture or poor drainage. Use a clean, sharp knife or pruning shears to cut away all rotted tissue until you see firm, green flesh.
Disinfect your tools before and after cutting to avoid spreading bacteria or fungi. If the base is rotten but the top looks healthy, you can propagate the healthy section. Let the cut surface dry for a few days before replanting.
Place the trimmed cactus in a dry, shaded area. Avoid watering until the wounds form a callus. This step prevents new rot and prepares the plant for repotting in fresh, well-draining cactus soil mix.
Repotting in Well-Draining Soil
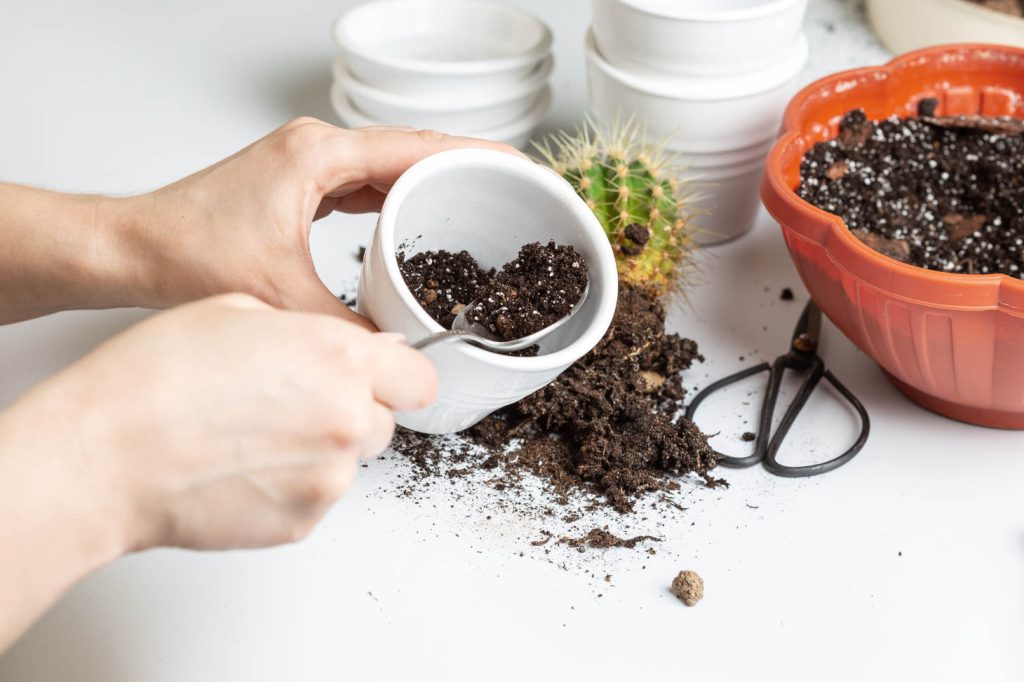
Use a pot with drainage holes and fill it with a fast-draining cactus potting mix or a blend of regular potting soil, coarse sand, and perlite. This mixture ensures well-draining soil that prevents water from sitting around the roots.
Gently remove the cactus from its old pot. Brush off old, wet soil and inspect the roots. Trim any mushy or black roots before planting. Set the cactus so its base is level with the soil line to anchor the plant correctly.
Avoid packing the soil too tightly. Loose soil allows oxygen to reach the roots and helps prevent future rot. Do not water right away; let the plant adjust in its new environment first.
Drying and Recovery Process
After repotting, place the cactus in bright, indirect light for several days. This helps it recover without stress from direct sunlight. Wait at least one week before watering to allow any damaged roots to heal and callus. Watering fresh root wounds can lead to rot.
When you water again, do it sparingly. Allow the soil to dry completely between waterings. Overwatering is the most common reason cacti decline, so use a light hand.
Monitor the plant for signs of new growth, such as firm tissue or small buds. These are signs your cactus is stabilizing and beginning to recover.
Optimizing Cactus Care for Recovery
Healthy recovery depends on how you manage water, light, and soil conditions. Each factor directly affects how well your cactus can repair tissue, prevent rot, and grow new roots.
Adjusting Watering Patterns
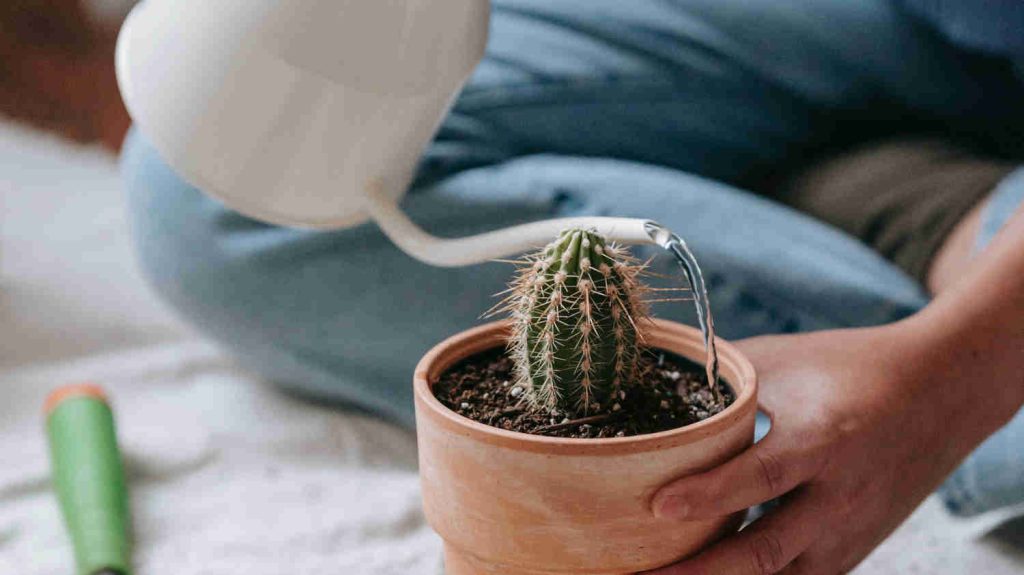
Cacti, like other succulent plants, store water in their stems. Overwatering is the most common cause of decline. You should only water when the soil is completely dry. To check, insert a wooden skewer or chopstick deep into the soil. If it comes out clean and dry, the soil is ready for water.
Use the “soak and dry” method: water deeply until it drains from the bottom, then let the soil dry fully before watering again. This mimics natural desert rainfall cycles.
In cooler months, reduce watering frequency since evaporation slows and roots absorb less moisture. Always use a pot with drainage holes to prevent standing water, which leads to root rot.
| Season | Watering Frequency | Notes |
|---|---|---|
| Spring/Summer | Every 1-2 weeks | Adjust for temperature and humidity |
| Fall/Winter | Every 4-6 weeks | Reduce watering; avoid soggy soil |
Managing Sunlight Exposure

Cacti need bright but indirect sunlight to recover. Too much direct sun can scorch weakened tissue, while too little light causes stretching and pale color. Place your cactus near a south- or east-facing window that receives filtered light.
If you move it outdoors, do so gradually. Sudden exposure can burn the skin of the plant. Start with a few hours of morning sun and increase time each week.
Watch for warning signs:
- Yellowing or brown patches = too much light
- Thin, elongated growth = not enough light
Rotate the pot every few days to ensure even light exposure and balanced growth.
Choosing the Right Pot and Soil

A healthy cactus depends on fast-draining soil and a pot that allows airflow. Use a mix designed for cacti, usually containing coarse sand, perlite, or pumice. Avoid regular potting soil, it retains too much moisture.
Select a terracotta or unglazed clay pot. These materials let moisture escape and reduce the risk of root rot. The pot should be just slightly larger than the root ball to prevent excess soil from holding water.
When repotting, remove any rotted roots and let the plant dry for a day before placing it in new soil. This helps prevent fungal growth and encourages healthy root development.
Preventing Future Problems
Keeping your cactus healthy means staying alert to pests, moisture levels, and sudden changes in light or temperature. Small problems often start quietly, so early action helps prevent serious damage later.
Controlling Pests and Infestations
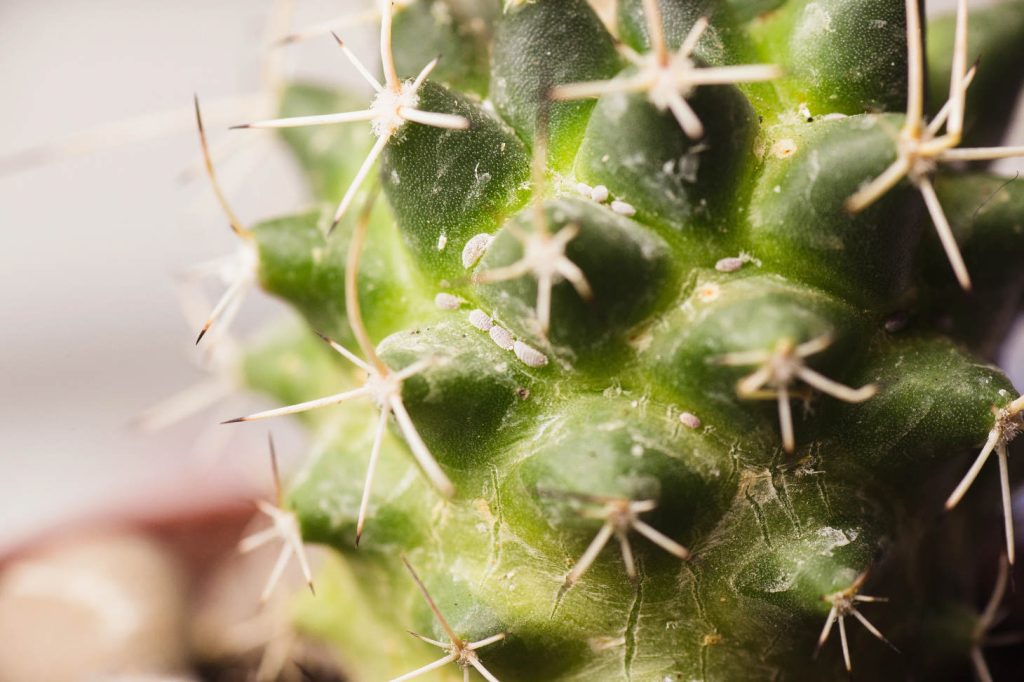
Pests such as spider mites and mealybugs often hide in crevices or under spines. You may notice fine webbing, sticky residue, or white fuzzy spots on the plant’s surface. These insects feed on sap, weakening the cactus and slowing its growth.
Inspect your cactus every week. Use a magnifying glass if needed to spot early signs. Remove visible pests with a cotton swab dipped in isopropyl alcohol. For heavier infestations, rinse the plant gently with water or apply a mild insecticidal soap.
Keep the area around your cactus clean. Avoid overcrowding plants since poor airflow encourages pests. A small table can help organize your care routine:
| Problem | Common Sign | Quick Action |
|---|---|---|
| Spider mites | Fine webbing, yellow spots | Spray with water and isolate plant |
| Mealybugs | White cotton-like clusters | Dab with alcohol and prune damaged parts |
Monitoring Environmental Stress
Cacti prefer steady conditions. Too much water, intense sun, or sudden drafts can cause wilting or discoloration. Monitor for shriveling (often due to underwatering) or soft, mushy spots (often due to overwatering/rot) as key signs of distress.
Keep your cactus in bright, indirect sunlight and rotate it occasionally to promote even growth. Use a well-draining soil mix and water only when the top inch feels dry.
Temperature consistency matters. Avoid placing your cactus near heaters, air vents, or cold windows. During winter, reduce watering and ensure the plant stays above 50°F (10°C). These small adjustments help maintain long-term health and prevent recurring problems.