Forest Bonsai
A forest bonsai lets you grow a small woodland in a single shallow pot. Instead of shaping one tree, you arrange several trees together to look like a natural forest. You control the spacing, height, and angle to create depth and balance.
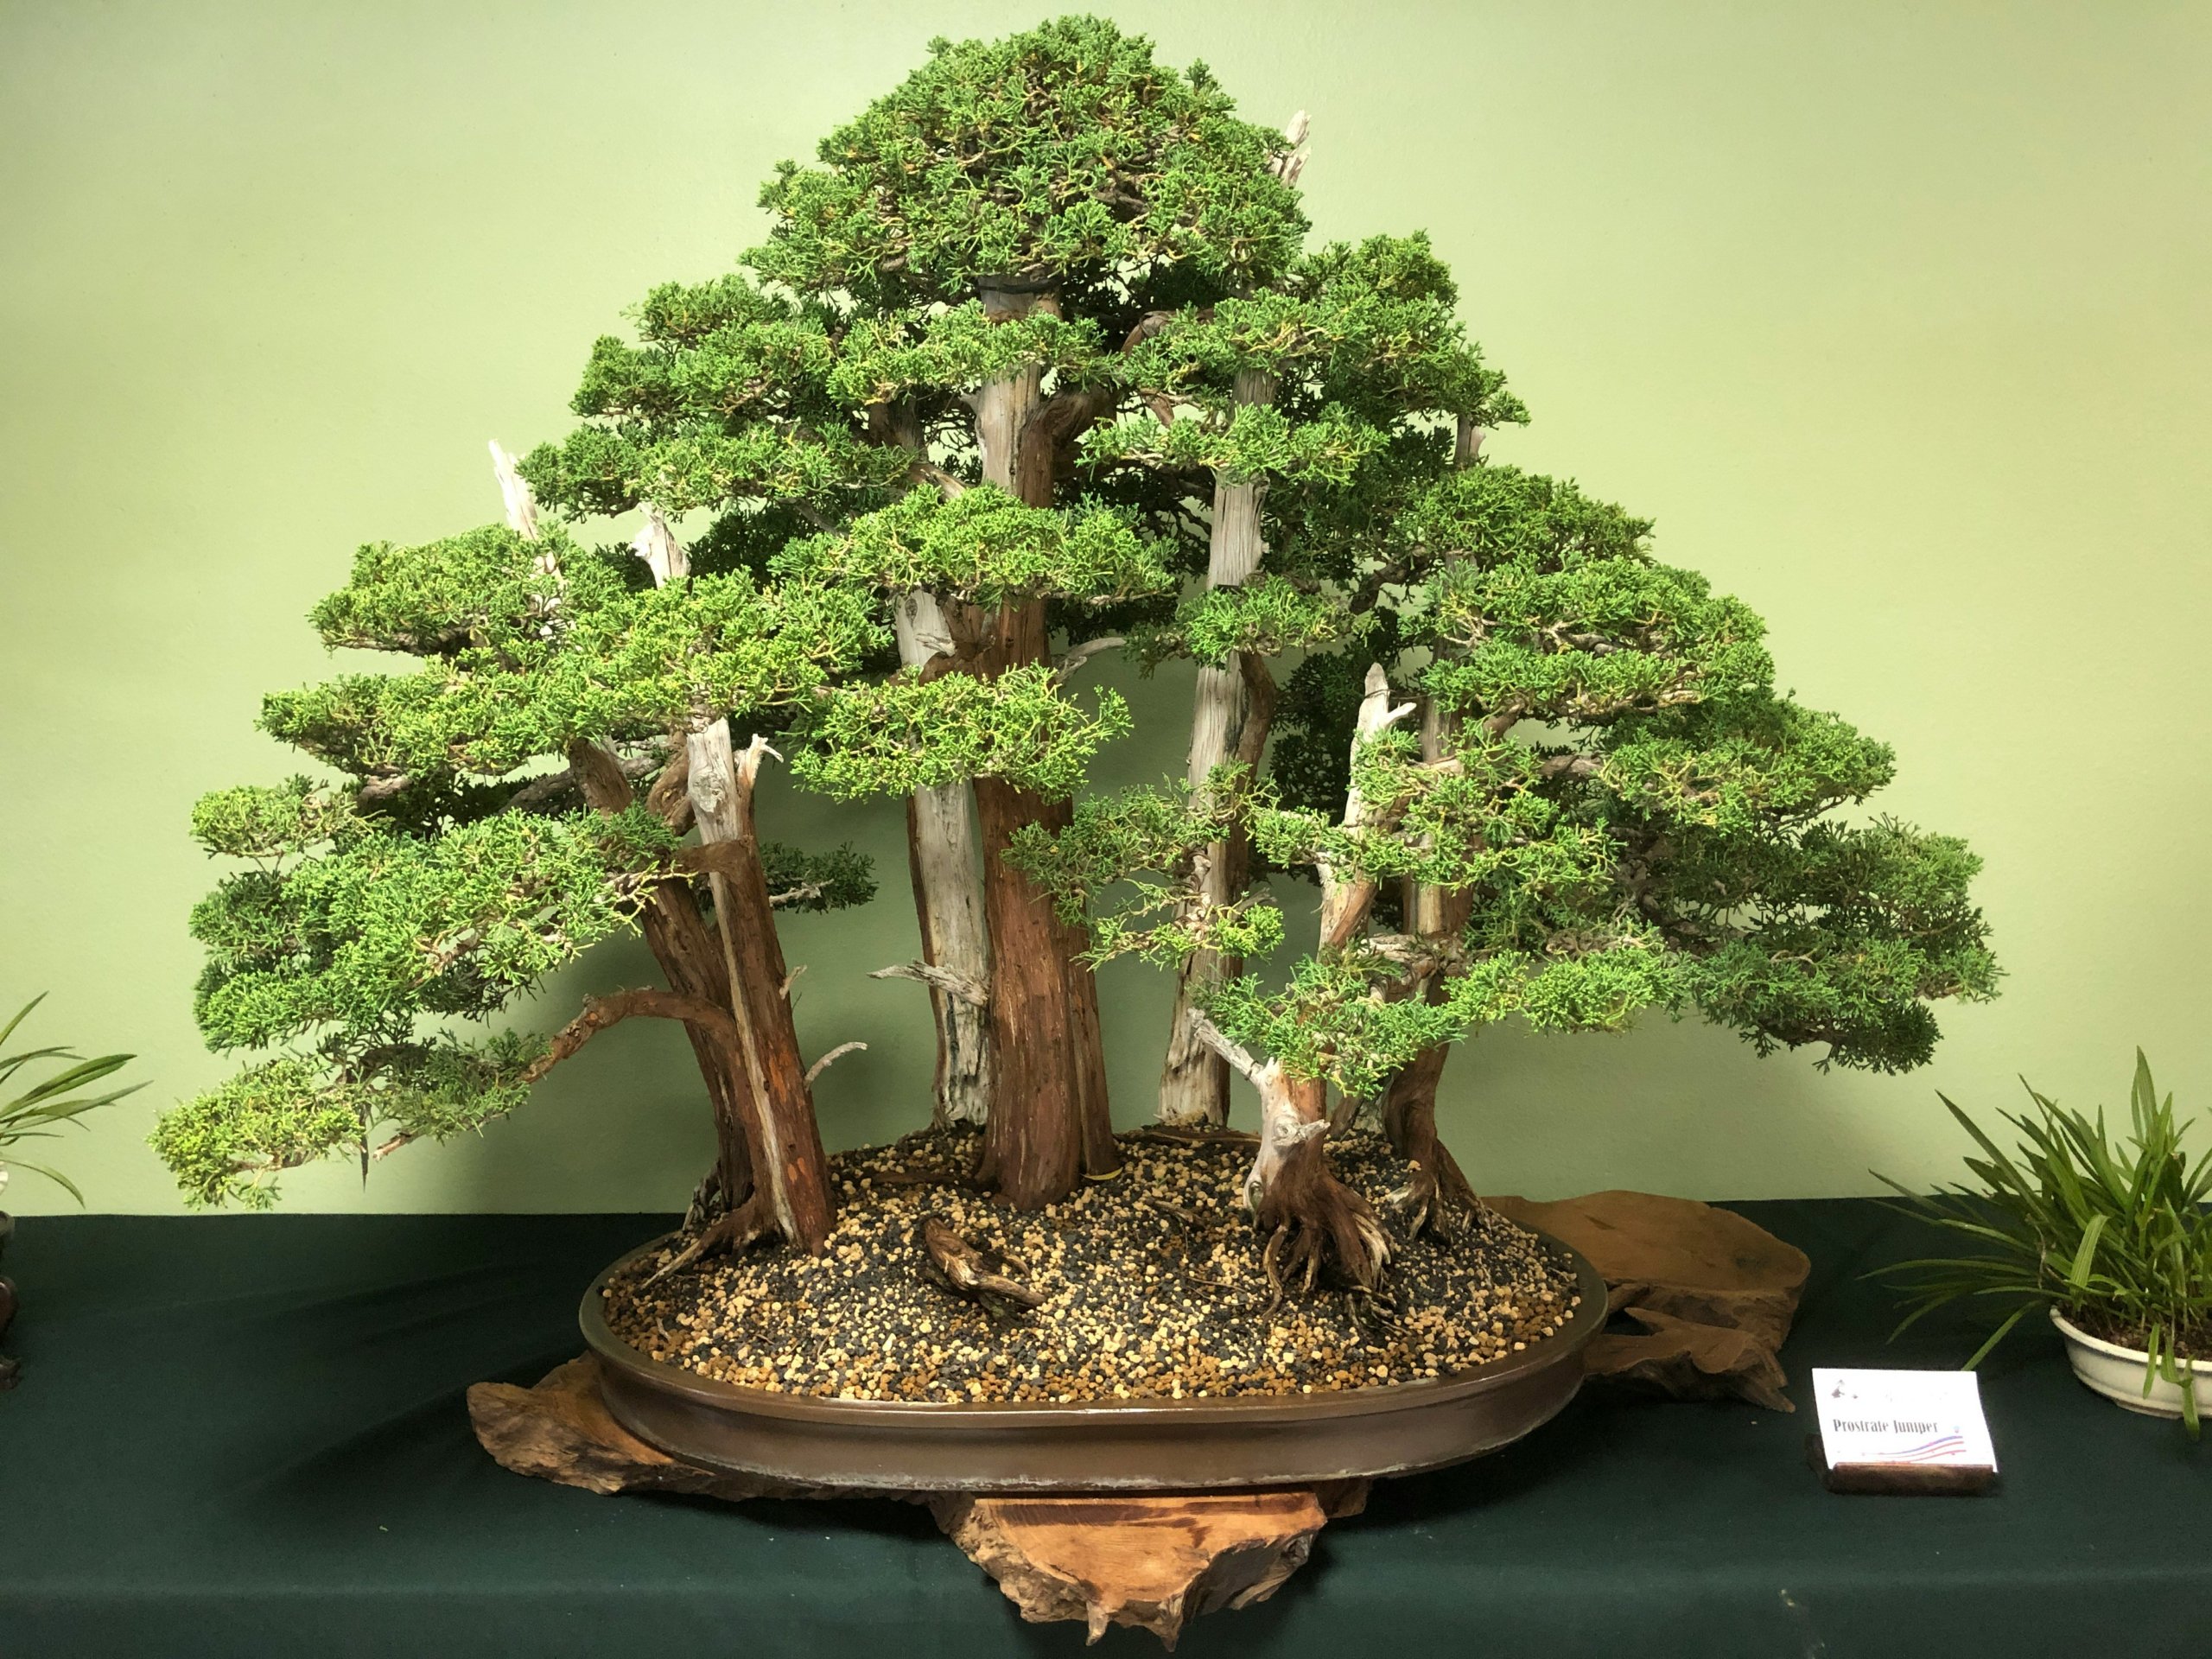
A forest bonsai is a group planting of multiple trees in one container arranged to look like a natural forest scene. Each tree supports the design, and no single tree should overpower the group. You often use the same species, such as pine, juniper, elm, or zelkova, to keep the forest unified and realistic.
When you build a forest bonsai, you focus on layout, tree size variation, and open space. Careful pruning and proper spacing allow light and air to reach every tree. With the right plan, you create a calm, natural setting that feels mature and complete.
Key Takeaways
- A forest bonsai uses multiple trees in one shallow container to create a natural forest look.
- You design the group with different tree sizes and balanced spacing for depth.
- Proper planting, pruning, and care keep the entire forest healthy and unified.
Understanding Forest Bonsai
Forest bonsai recreates the look of a natural woodland in a shallow container by arranging multiple trees as one unified design. You control tree choice, spacing, height, and balance to build depth and a clear visual structure.
What Is a Forest Bonsai
A forest bonsai is a planting of several trees in one pot to represent a small forest scene. Unlike a single-tree bonsai, this style depends on how the trees relate to each other. You create one image from many trunks.
Many growers call this style yose-ue, which means group planting. In this form of bonsai group planting, you use trees of the same species in most cases. This choice keeps the forest believable and avoids visual conflict.
You place the trees in a shallow, wide container. The number of trees is often odd, such as 3, 5, or 7, to prevent symmetry. Each tree supports the group rather than standing alone.
Healthy roots, similar trunk shapes, and matching leaf size matter. If one tree looks out of place, the whole forest composition feels unbalanced.
Bonsai Forest Styles and Techniques
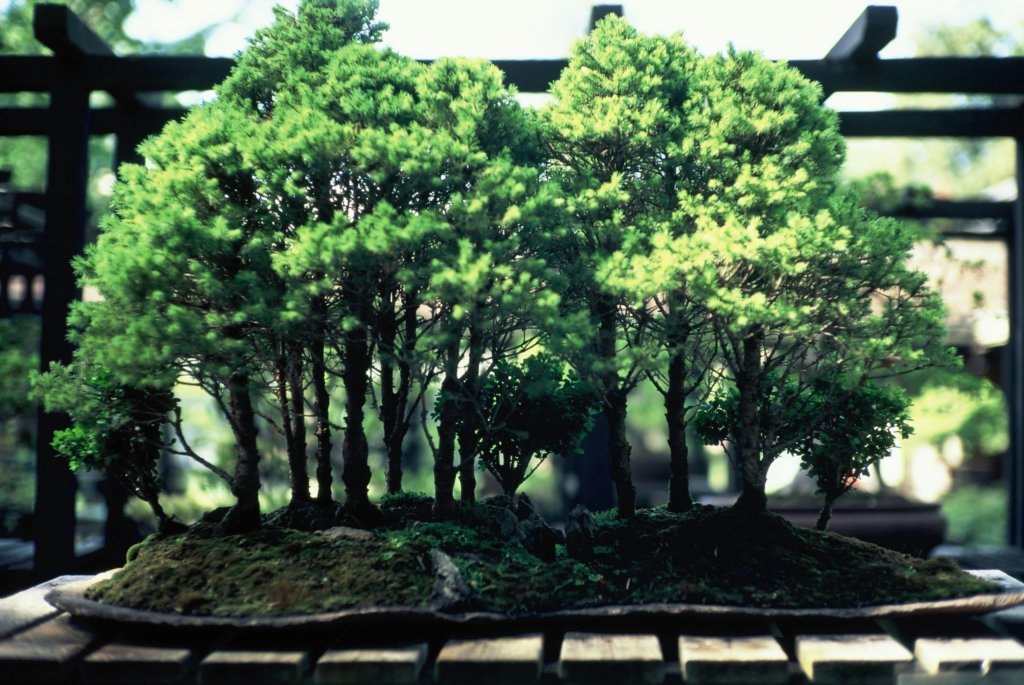
You can design bonsai forests to reflect different natural settings. Some show a dense woodland, while others suggest an open grove with space between trunks. Your layout should match how the species grows in nature.
Start forest planting by selecting trees with different heights and trunk thickness. Use one taller tree as the visual anchor. Add medium and smaller trees around it to build depth.
Key techniques include:
- Staggered placement to avoid straight lines
- Slight trunk angles for a natural look
- Uneven spacing to prevent symmetry
- Shallow planting to keep roots compact
You should also consider climate and species needs. Trees in one bonsai forest must share similar light, water, and soil needs. Mixing trees with different care demands often leads to weak growth.
Forest Composition and Hierarchy
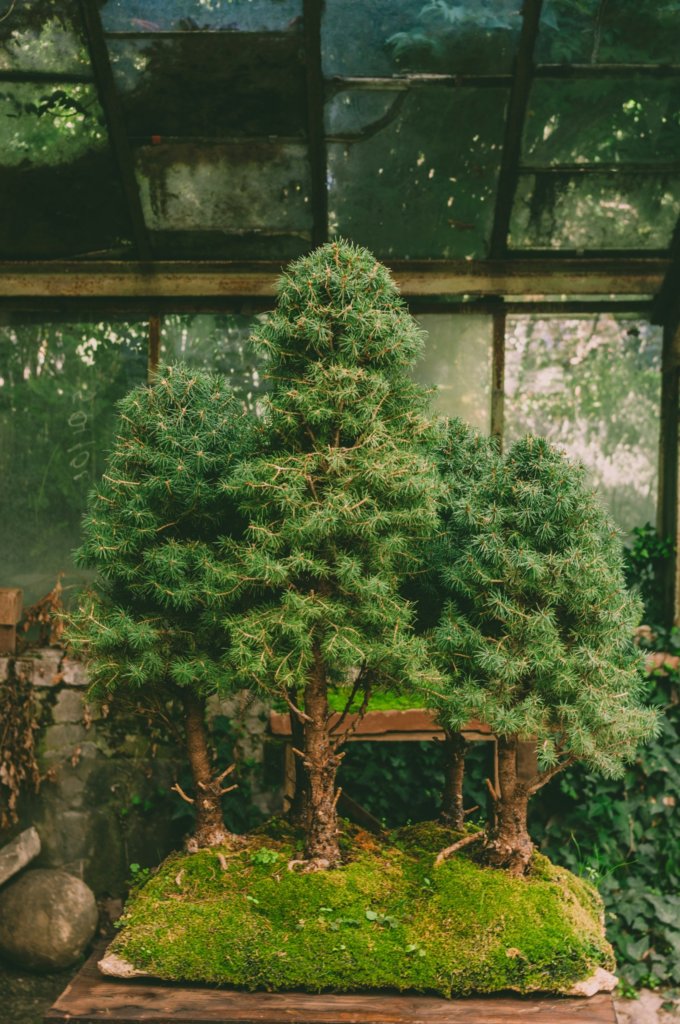
Strong forest composition depends on a clear hierarchy. You need one dominant tree that acts as the focal point. This tree is usually the tallest and thickest trunk.
Place the dominant tree slightly off center. This creates movement and avoids a static design. Surround it with smaller trees that lean subtly toward or away from it.
You can think of the structure in simple layers:
| Layer | Role in the Design |
|---|---|
| Tall trees | Create canopy and focus |
| Medium trees | Support structure and depth |
| Small trees | Add scale and perspective |
Avoid lining trees up in rows. Instead, group them in small clusters to mimic natural growth patterns. When you control height, spacing, and direction, your forest bonsai reads as one unified landscape rather than separate plants.
How to Create a Bonsai Forest

To create a bonsai forest, you must choose the right trees, arrange them with purpose, and plant them in a way that builds depth and stability. Careful aftercare then helps the group planting grow as one balanced composition.
Choosing Tree Species and Quantities
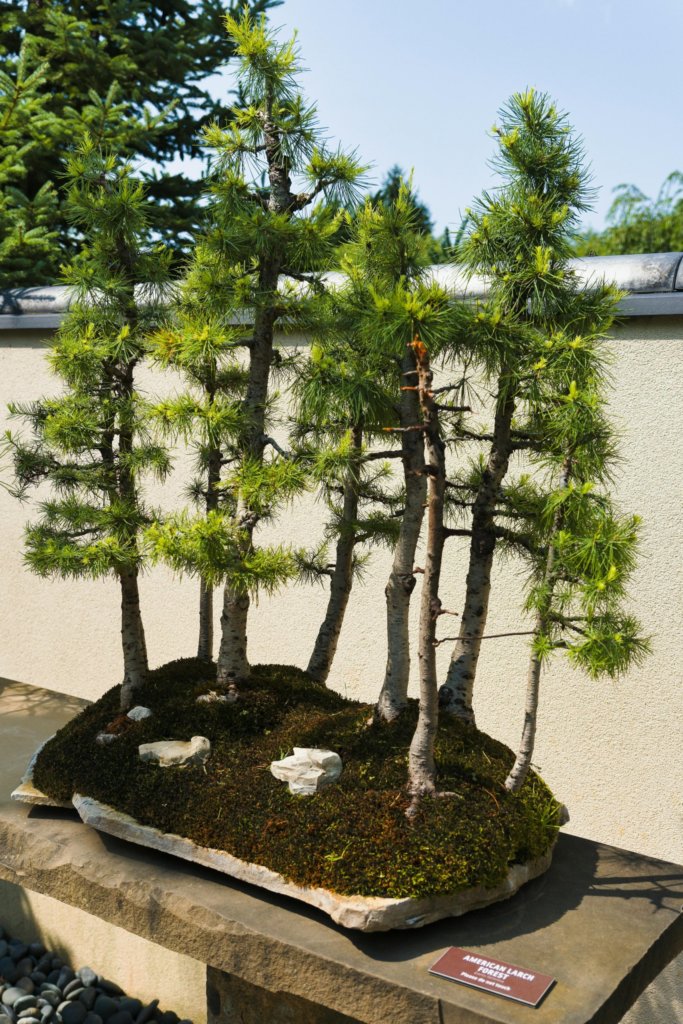
Start by selecting species that share the same light, water, and soil needs. This step makes aftercare much easier. Popular choices for a bonsai forest include Japanese maple, beech, juniper, elm, and pine.
Use one species for a natural and unified look. Mixed species can work, but they must grow at a similar rate and tolerate the same conditions.
Plan to use an odd number of trees, such as 5, 7, 9, or more. Odd numbers look more natural to the eye. Avoid even numbers, which can look too balanced and artificial.
Include different trunk sizes. Choose:
- 1 dominant tree (thickest and tallest)
- 2–3 medium trees
- Several smaller trees
This size variation creates structure and supports depth and perspective from the start.
Planning and Arranging the Layout
Before planting, place the trees on the soil surface and test several layouts. Do not plant right away. Move the trees until the arrangement feels natural.
Position the dominant tree slightly off-center. Avoid placing it in the exact middle of the pot. Nature rarely grows trees in straight lines or perfect symmetry.
Create small clusters instead of spacing trees evenly. Leave open areas to act as visual pathways. These empty spaces suggest clearings inside a forest.
Tilt some trunks slightly to avoid a stiff look. Keep all trees leaning in a similar direction if you want to suggest wind movement. Make sure trunks do not cross when viewed from the front.
Step back often and check the design from eye level. This helps you see whether the bonsai group planting looks balanced and realistic.
Selecting Pots and Bonsai Soil Mix
Choose a shallow and wide container. Forest bonsai need horizontal space more than depth. A shallow oval or rectangular pot works well for most designs.
Make sure the pot has several drainage holes. Good drainage prevents root rot, which is a common risk in group planting.
Use a well-draining bonsai soil mixture. A common bonsai soil mix includes:
| Component | Purpose |
|---|---|
| Akadama | Holds moisture and nutrients |
| Pumice | Improves drainage |
| Lava rock | Adds structure and airflow |
Adjust the ratio based on your climate. In dry areas, use more akadama. In wet climates, increase pumice or lava rock for better drainage.
Sift out fine dust before planting. Fine particles reduce airflow and harm root health.
Establishing Depth and Perspective
You create depth and perspective by controlling tree size and placement. Larger trees go toward the front. Smaller trees sit toward the back.
Plant back trees slightly higher in the soil. This subtle height change increases the illusion of distance.
Space trees closer together in the front and slightly tighter in the back. This mimics how forests appear in nature. Avoid placing trees in straight rows.
Use thinner trunks in the background. Thick trunks in the rear break the illusion of scale.
You can also angle background trees slightly inward. This draws the viewer’s eye into the bonsai forest and strengthens the sense of depth.
Techniques for Group Planting and Securing Trees
Prune roots before planting, but avoid removing too much at once. Trim long roots so the trees sit flat in the shallow pot.
Add a thin base layer of coarse soil for drainage. Then create small soil mounds where each tree will sit. Spread the roots evenly over these mounds.
Secure each tree with aluminum or copper wire through the drainage holes. Tie the wire firmly but not tightly enough to damage roots.
In a forest (Yose-ue) planting, physical stability is vital because the individual root systems must eventually fuse into a single mass. Because trees are planted so closely in a shallow tray, they must support each other physically once established; their roots eventually intertwine to form a single, solid root mass. This collective system provides the stability necessary for the group to survive and thrive in such a thin layer of soil.
After positioning all trees, add soil between the roots using a chopstick. Push soil into air pockets. Air gaps can dry roots and weaken the planting.
Water thoroughly until the water runs clear from the drainage holes.
Initial Aftercare and Maintenance
Place the newly planted bonsai forest in partial shade for two to four weeks. This reduces stress while roots recover.
Keep the soil evenly moist but never waterlogged. Because many trees share one pot, they compete for water. Check moisture daily.
Avoid heavy pruning during the first growing season. Let the trees regain strength. Light trimming is fine if growth becomes uneven.
Wait about four to six weeks before applying mild fertilizer. Use a balanced product and avoid strong doses.
Watch for signs of stress such as yellow leaves or weak growth. Early action prevents problems from spreading across the entire forest bonsai.